How to make crispy air-fryer squash
A recipe for two with golden edges and a soft centre. Get the cut, basket space and cooking time right.
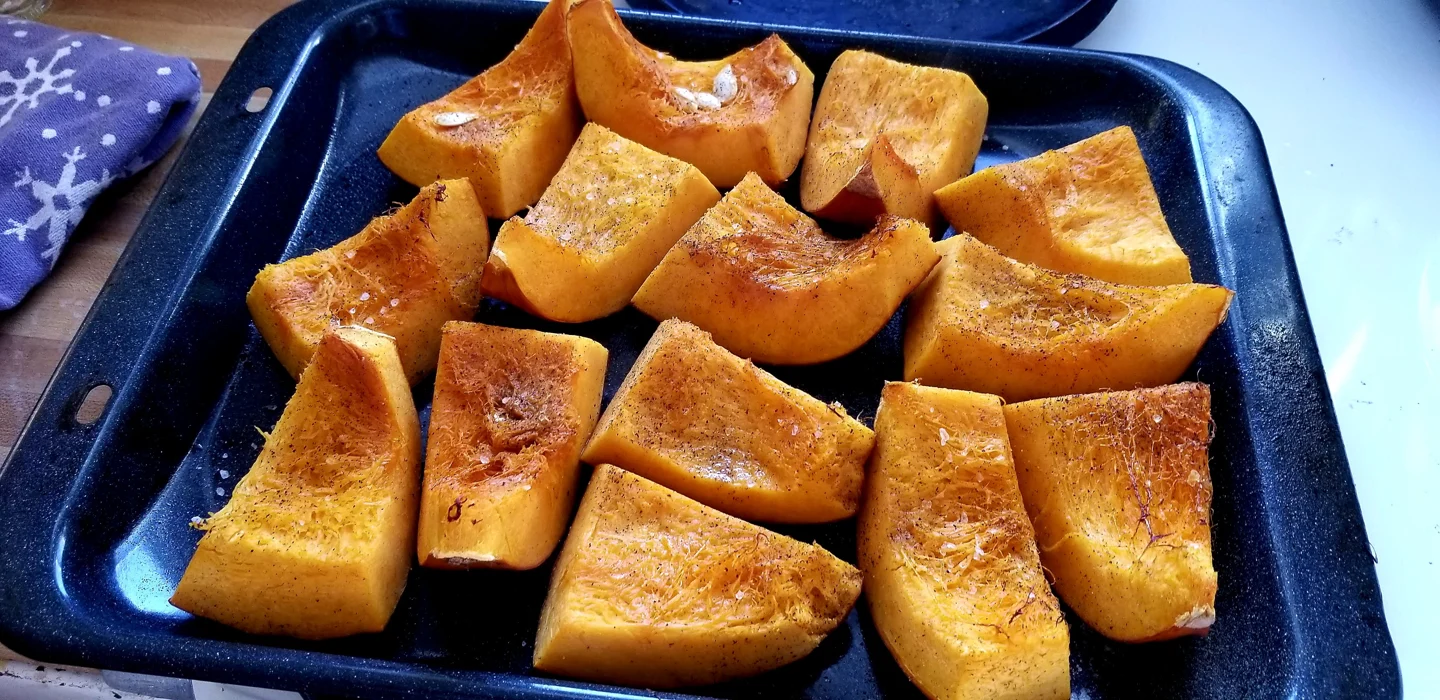
It looks orange, smells lovely and seems ready. Then you serve it and discover it’s soft all over, when you wanted those golden edges that people pinch before they sit down. For crisper air-fryer squash, start with firm flesh, evenly sized pieces and room for air to move. Turning up the heat won’t fix an overcrowded basket.
Aim for golden, slightly crisp edges and a soft centre. Different squash varieties produce different results, depending on how much water is in the flesh, how thick you cut it and which air fryer you use. Look for colour at the edges and check how readily a fork goes in. The timer gives you a starting point. The last look is yours.
Which squash should you choose?
Try Delica for its firm flesh, or use butternut squash. If you already have a different variety, use it and adjust as you go. A watery slice and a firm one may cook differently, even when cut to the same size.
If you buy pre-cut squash, check that it’s been stored properly and follow the pack instructions. Wash a whole squash before cutting it and work on a stable board. Use a suitable knife and avoid forcing a blade that’s stuck. For this recipe, remove the skin, seeds and stringy bits so the pieces are easy to season and check.
Ingredients for two
You’ll need 500 g of prepared squash, one tablespoon of extra virgin olive oil, a little salt, pepper if you like, and rosemary or thyme. Choose one herb to go with the sweetness of the squash. The rosemary, sage, curry powder, paprika and garlic can all have their turn on another day.
Cut the flesh into cubes about 1.5 cm across. Keep them roughly the same size so the little pieces don’t brown before the big ones soften. Pat the pieces dry with kitchen paper. Toss them with the oil and herbs in a bowl just before cooking. Set up your air fryer as directed, including preheating if the manual calls for it.
Cooking time: use it as a guide and check the squash
For cubes this size, start with about 18–20 minutes at 190–200 °C, turning them halfway through. Cooking time varies with the machine, the size of the pieces and how much you’re cooking. A wider range for other cuts and portions is 12–20 minutes at 180–200 °C. Check the squash as it cooks so you can adjust.
Spread the pieces in a single layer. Cook in batches if you can’t fit them with a little space. Halfway through, shake or turn them using suitable utensils. When the edges start to brown, check the middle with a fork. It should go in easily. If the outside darkens too quickly, lower the temperature and let the centre finish cooking.
Why is it still soft after twenty minutes?
Look at the basket before blaming the machine. Were the pieces piled up? Did the liquid from the bottom of the bowl go in too? Did thin cubes go in alongside thick wedges? Change one thing at a time. A quick note like “half a basket, small cubes, turned halfway” will be more useful next time than “it didn’t work”.
Timing matters once the cooking is done, too. Pile the hot squash into a covered bowl and steam gathers around it. For drier edges, have the rest of dinner ready before you start the last batch, then serve promptly. When the middle is tender and the edges are dark, more time can dry out one part without helping the other.
Try a breadcrumb crust
For a gratin-style finish, toss the pieces with a tablespoon of breadcrumbs and a little grated cheese. Watch the colour closely towards the end. The coating can brown before a thick piece cooks through. If you need to avoid gluten or milk, choose ingredients that meet your needs and read the labels.
Keep it simple and add flavour at the table with a chopped fresh herb or a sauce on the side. Plain yoghurt with lemon and herbs is a fresh option. Prepare it and keep it refrigerated until serving. With the sauce on the side, everyone can choose how much to add. One basket, two ways to enjoy it.
Using frozen squash
The steps above are for fresh prepared squash. For frozen squash, follow the directions on the pack and cook it from frozen if that’s what they specify. Small dice and large chunks need different checks, especially when you’re trying to dry the surface without burning the edges.
Keep the air vents clear and use liners and accessories only as your manual allows. Remove the basket carefully and set it down where the instructions say it’s safe. The edges will be hot, however tempting the squash smells. Clean the removable parts as directed once you’re done. It’ll be ready for the next evening when you’re short on time and the sink is already full.
What if there’s some left?
After storing leftovers properly in the fridge, reheat them thoroughly and add them to pasta, couscous or a puréed soup. They’ll be softer than they were straight from the basket, so pick a dish that suits that texture. Next time, weigh what you usually eat and plan your batches around it.
Same-sized pieces, a dry surface and room for the air to circulate. Then take a look at the squash itself. A fork should catch a golden edge and slide into the tender flesh. If someone starts picking at the pieces before you make it to the table, the smell has done its job.
SOURCES AND FURTHER READING
Did this story touch your heart?
Share this story